Kartoza - Consuming Cloud Optimised GeoTIFFs in QGIS Server
QGIS has been able to consume cloud optimised GeoTIFFs (COGs) since v3.2, through the data source manager.
QGIS has been able to consume cloud optimised GeoTIFFs (COGs) since v3.2, through the data source manager. This article does not aim to explain what a COG is as various other articles have done so extensively.
Many organisations are choosing to use cloud based storage like S3 or Google Cloud Storage. Traditional GIS file formats can easily sit in the cloud, but serving up web map tiles or doing on-the-fly processing of the data are difficult to do efficiently with those formats. They often have to be fully downloaded to another location and then translated to an optimised format or stored in memory.
In this article I will describe the process of publishing a QGIS project with COG (in local storage) using QGIS Server. In future articles I will describe how the COG layer can be processed using QGIS Server algorithms to generate new data in an efficient way.
This is the docker-compose.yml file:
version: '2.1'

volumes:
   transfer-data:
   web-data:
   plugins:

services:
   transfer:
     image: dutchcoders/transfer.sh:latest
     volumes:
       - transfer-data:/data
     ports:
       - "8080:8080"
     restart: on-failure
     command: --provider local --basedir /data --temp-path /data
     healthcheck:
       test: "exit 0"

   qgis_server:
     image: 3liz/qgis-map-server:3.8
     environment:
       - QGSRV_SERVER_WORKERS=10
       - QGSRV_LOGGING_LEVEL=DEBUG
       - QGSRV_CACHE_ROOTDIR=/projects
       - QGSRV_CACHE_SIZE=10
       - QGSRV_SERVER_PLUGINPATH=/plugins
       - QGIS_SERVER_PARALLEL_RENDERING=true
       - QGIS_SERVER_MAX_THREADS=10
     ports:
       - 8081:8080
     volumes:
       - web-data:/projects
       - plugins:/plugins
     depends_on:
       transfer:
         condition: service_healthy
I downloaded a DEM layer and followed the procedure from GDAL on how to generate a COG. Using docker-compose I started my containers by running docker-compose up -d
The container transfer allowed me to simulate a cloud storage server like S3 or Google Cloud Storage.
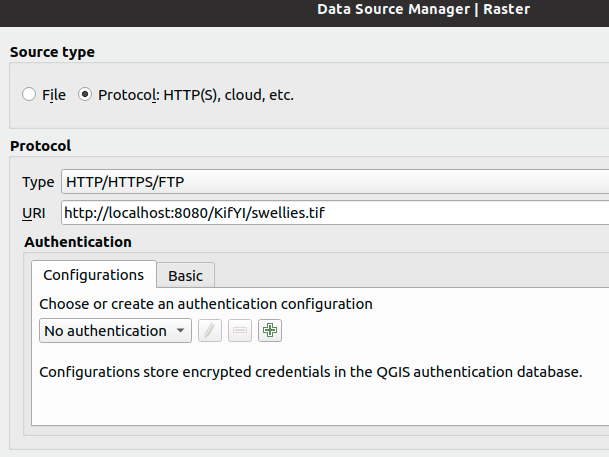
After uploading my raster layer through the transfer interface I could access it from the URL http://localhost:8080/KifYI/swellies.tif
I then added this raster to QGIS using the datasource manager as depicted below.
I then proceeded to create a project in QGIS and configured it to be published by QGIS Server.
I opened the QGIS project in a text editor to change the URL from http://localhost:8080 to http://transfer:8080since the QGIS project is to be consumed by QGIS Server in Docker and the two containers are linked. I then copied the QGIS project into the qgis container and I could connect to WMS services from QGIS using the following URL http://localhost:8081/ows/?MAP=cogo.gqs
The image below gives an illustration of how QGIS Server is accessing the HTTP GET range request .
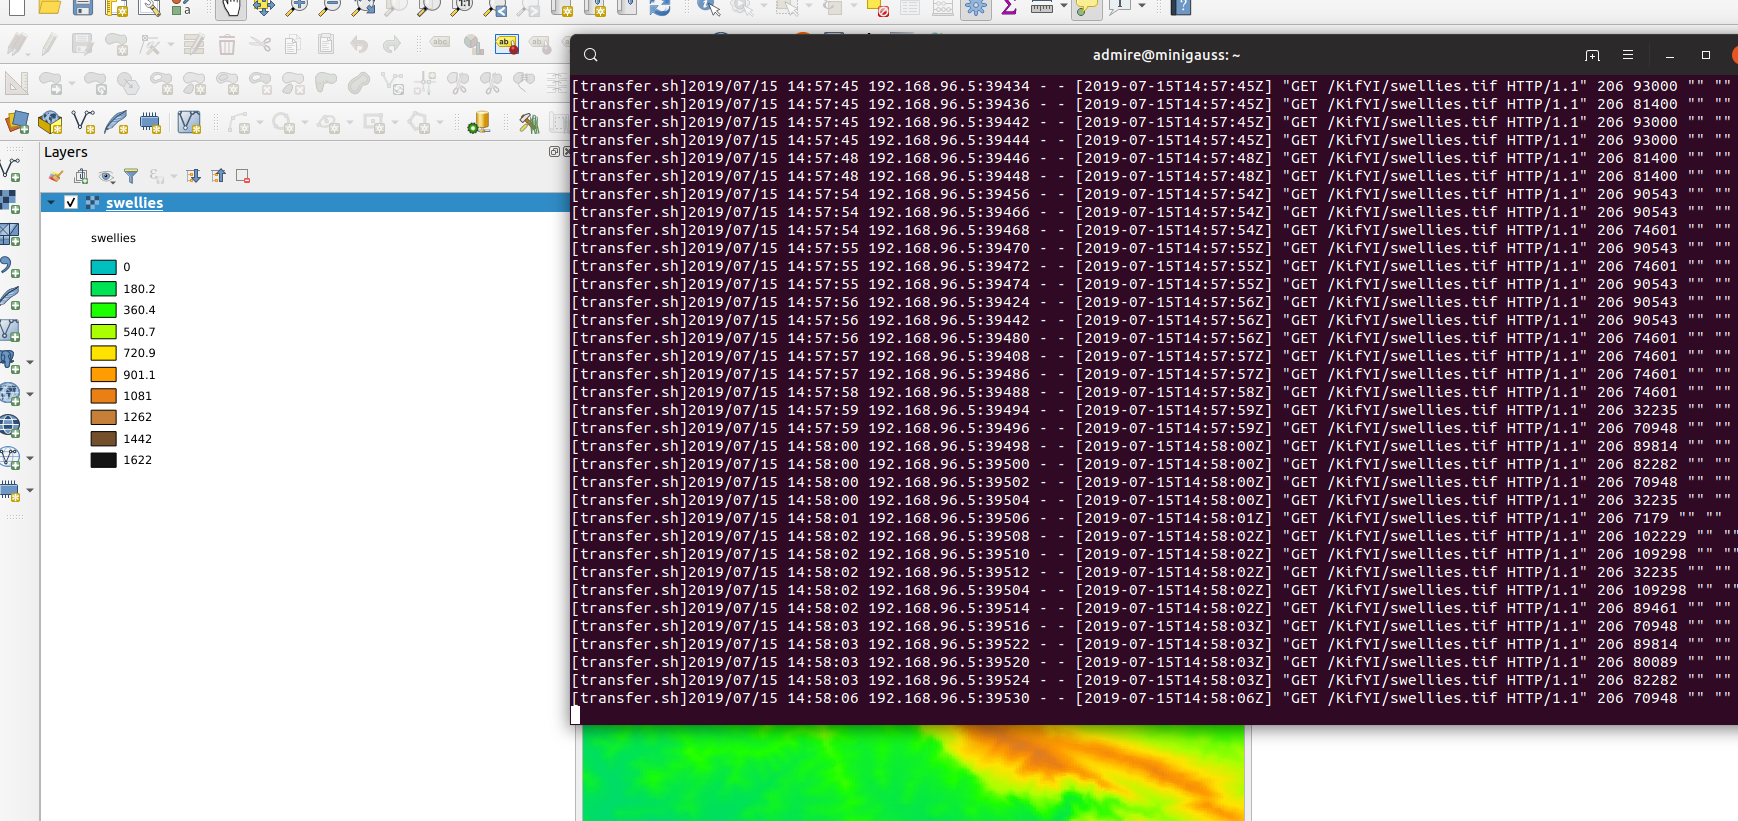
In other set-ups like GeoTrellis they have built tools that allow users to process certain portions of the image and generate new data. This is very efficient as the whole tile is not loaded in memory or downloaded before processing is done.


No comments yet. Login to start a new discussion Start a new discussion